Thursday, 14 August 2014

Dinner Saved by a Surge Protector

The Surge Protector that Gave Up It's Life in the Name of Supper!


Last night were we were cooking supper using the microwave at home and it just decided to take a break. Then we tried to switch it on again, and it didn't budge. I then decided to plug the microwave into another power outlet to see if maybe the power outlet is a problem. The microwave still kept quite. The I noticed that the leds on the power surge protector plug were off. This meant that surge protector was dead. The power protector had died saving the microwave and our dinner. I thanked myself for putting the power surge protectors, as seen in figure 1, on each appliance in the house.

Figure 1: Model of the power surge protector that was used

Friday, 4 July 2014

Giga What? Giga This, Giga That, Gigabit Networks

Gigabit Network


Recently I bought a ZTE MF253 LTE Modem Router.


ZTE MF253 LTE Modem Router


This made me realise that my current home network which is using the Netgear MBRN300 modem router is not fast enough for connecting my other network devices anymore. This means I had a challenge of introducing the new LTE modem router into the network and upgrade the network at the same time. After some research I ended buying the Netgear GS608 8 port Gigabit switch. This switch is capable of transmitting data between network devices at 1000Mb/s!

Netgear GS608 8 Port Gigabit Switch


The switch will allow me to watch high resolution movies on my home network without having to worry about bandwidth and I can take advantage of the LTE modem's high speed Internet connection. On the MBRN3000 modem router using an HSDPA USB modem I used to get a peak download speed of 2.2MB/s on the Vodacom network. I did a speed test recently with LTE modem  and I can do 8Mb/s on the Vodacom network. Happy networking!

As a bonus, the ZTE MF253 can also work as network media server. Yes, you guessed it, the router is compatible with your other DLNA certified devices. All you have to is attach a usb hard drive to the modem router and all your media can played on compatible devices on the network.

Tuesday, 4 March 2014

QNAP HS-210 - The NAS For Your Living Room

QNAP has a launched a fanless dual bay NAS device. The device does not only look great but it is fanless! Through some clever engineering they have created a big heat sink on the top of the device that eliminates the need for a fan.

QNAP HS-210 Dual Bay NAS
Checkout a review of the device by audiostream magazine here

Tuesday, 18 February 2014

Netgear Stora Recovery - Firmware Reinstall

Unbrick My Stora

Steps for installing Netgear Stora Firmware are:

Note: Your NAS needs to be attached to router with an internet connections

  • To put the device into recovery mode, power on the device, wait 15 seconds (exactly), then hold the reset button while bootup continues. The bootup process will take approximately 30 seconds and the blue LED will be blinking during that period.
  • As soon as the recovery mechanism kicks in, the blue light turns off and HDDLED1 will turn orange. The reset button can be released at this point. Your NAS drive will go through the following actions:
    1. Then the device will request a DHCP lease and try to get an IP,
    2. If an IP is obtained, HDDLED2 will also turn orange for 1 second. 
    3. If no IP is assigned the following pattern will be shown on the leds and the recovery mechanism will stop: Power LED Off -> HDDLED1 and HDDLED2 will blink 3 times together -> All LEDs off
    4. Once network is up, the download and burn process will begin. During the download procedure the LED behaviour is: Power LED Off -> HDDLED1 and HDDLED2 will turn on and off in turns. Below is a video of the flash pattern

  • The download and burn will take around 4-5 mins with a fast connection speed.
  • Once the download and burn is done: 
      1. If the burn is successful, all LEDs will turn on for 5 seconds and then the device will reboot normally
      2. If the burn fails the LED behaviour will stay as follows and the recovery mechanism will stop : Power LED On -> HDDLED1 and HDDLED2 will blink together

Thursday, 23 January 2014

Rotel Went DAC

Rotel has launched it's first DAC. I really like Rotel products as they have remained "pure" throughout the years - they only make sound electronics, no speakers, no tvs. I bought myself a Onkyo iPod transport a few years back and have not found a good DAC to pair it with.


Onkyo ND-S1 iPod Transport
Now I have the Rotel DAC in my sights, must start saving, this thing is a beauty!

 
Rotel RDD-1580 DAC Back

Rotel RDD-1580 DAC Front
I will get it in Silver as I think audio components in silver never look out of age
 
Rotel RDD-1580 DAC in Silver at the Top of The Rack

Wednesday, 1 January 2014

Netgear Stora 3TB or 4TB drives

I am reapeating this post from the Netgear Stora forums as a backup, the post is copied from http://forum1.netgear.com/showthread.php?t=72007&page=3 anf here it is:

Since i'm not getting posts from the forum and netgear isn't going to upgrade to support 3tb drives, i'm just going to post it here:

First, you need SSH access to your stora:

SSH Access to a Stora

First you need to get your Stora’s product key, it’s located behind the Stora, close to the ethernet port or may be on the bottom of the device, it’s in the form “XXXX-XXXX-XXXX-XXXX”.

Then you just need to SSH to your Stora with a particular user which is just one of the users created through the web interface (the user needs to have the administrator flag selected) concatenated by the string “_hipserv2_netgear_XXXX-XXXX-XXXX-XXXX” (where XXXX-XXXX-XXXX-XXXX is your product key, ALL CAPITAL LETTERS!), this time you’ll get a password prompt instead of the “connection to x:22 exited: remote closed the connection”, just enter the user password, which is the one you use to access your Stora through the web interface and you’ll get user access. Now to get root access you just need to write “sudo -s” and enter again the user password, every ADMINISTRATOR user is allowed to use the sudo command. You’ll probably get a: “audit_log_user_command(): Connection refused” but it doesn’t matter, you’ll get the root prompt!

Example: if you created a user named “stora”, flagging the “user is administrator” during the Stora setup or through the web interface and your Stora’s product key is “1234-5678-9999-9999? you just need to ssh to your Stora and use “stora_hipserv2_netgear_1234-5678-9999-9999? as user, either using Putty or your favorite SSH client and enter that user’s password, then “sudo -E -s” and you’ll get root access, that’s it!

There’s another way to login concatenating the username with the string “_axsync_” but it allows you to issue only “mkdir” and “rsync” commands.

Explanation:

Basically Netgear, or more probably Axentra, ships his software with a modified version of SSHD that disallows regular user access, except for “root” and “apache” users, what it does is basically changing the logging username by substituting the first character with a “0? so it doesn’t match with the list of allowed users inside the /etc/passwd.

The SSH Deamon leaves a “backdoor” open, which basically is: if your username is appended with the above string, this substitution doesn’t take place, and you can login normally.

p.s. the “hipserv2_netgear” part may be different for some users, although I suppose is the same for everybody, if you already hacked your Stora using other ways I’d ask you to check the “/etc/oe-release” and post here the DistName line and we’ll try to figure it out.

Now to setup your stora to support 3tb drives:

Requirements:

- Any SSH client
- Two 3TB or bigger drives
- Any USB stick inserted in the front of the stora

Log into your device via SSH

Copy every line step by step:

---Get root

sudo -E -s

---Navigate to sbin directory

cd /sbin

---Partition the first drive with GNU parted (to make a GPT file format so that 3TB+ drives work)

./parted /dev/sda
mklabel gpt
yes
[Press Enter]
unit TB
mkpart primary 0.00TB 3.00TB (4.00TB for 4tb but I haven't tried it).
print
quit

---Partition the second drive with GNU parted

./parted /dev/sdb
mklabel gpt
yes
[Press Enter]
unit TB
mkpart primary 0.00TB 3.00TB
print
quit

---Make the raid0 array with a blocksize of 128 (the blocksize is defaulted to 64, but 128 might be more desireable)

./mdadm --create /dev/md0 --level=0 --chunk=128 --raid-devices=2 /dev/sda1 /dev/sdb1

y

or

---Make the raid1 array

./mdadm --create /dev/md0 --level=1 --chunk=128 --raid-devices=2 /dev/sda1 /dev/sdb1

y

--- Wait for sync (also shows in web interface)

watch cat /proc/mdstat

*** Takes Long Time *** Mine took 4 1/2 hours.

---Make the USB Stick a swap partition and mount it as swap drive

./mkswap /dev/sdc
./swapon /dev/sdc

---Then we partition the drives to XFS filesystem

./mkfs.xfs /dev/md0

---Then we are going to text edit the fstab system (this system mounts the drive at startup)

vi /etc/fstab

Remove the # in front of

/dev/md0 /home xfs defaults,bsdgroups,noatime,nodiratime 0 0

Then as a finishing very important touch we make sure that the raid0 array is remembered at startup

./mdadm -Q --detail --brief /dev/md0 > /etc/mdadm.conf

Then reboot the device

./reboot

Wait a few minutes, you should see the device boot. The HDD leds will go from green to orange for a few seconds, don't worry they will become green again and you should hear the HDD's working. This is probably the stora finalizing the partition so that it's ready for use.

Wednesday, 20 November 2013

The Machines Will Rise - The Smartphone is Our Demise

They're Getting Smarter

MediaTek has unveiled the world's first true octa-core mobile chip recently. According to media reports and the company's figures, the MT6592 chip manages to beat what appears to be the quad-core Snapdragon 800 in benchmarks, power consumption (as low as 40 percent) and temperature.
This means the chip is doing more with less resources. Just what any cyborg (cybernetic organism) will appreciate. This means we can developer smarter and efficient cyborgs thanks to our pursuit of ever powerful and efficient mobile devices.

All over the world the development of these technologies, like the the LG G Flex self healing phone can be combined to create some advanced machinery. Watching this space.

Thursday, 14 November 2013

Raspberry Pi - The Hardware Equivalent to OSS

Raspberry Pi Anyone?


The Raspberry Pi is a credit card-sized single board computer which can be used for electronics projects. The product can be used for applications such as industrial control systems, security systems, entertainment systems, home automation systems and as a computer for teaching technolgy in schools and universities.

Raspberry Pi Computer


For information about the Raspberry Pi please visit the Raspberry Pi org website by clicking here. I have been planning to buy one now for some time. I will think of  project in 2014 before I buy one.

Wednesday, 6 November 2013

It is a Quantum Possibility

Time Travel - Beyond Existence


Dear quantum mechanic, would you for a moment, indulge the naive in the possibilities and implications of time travel.

Could and object or living being travel in time to a point before it existed or after its existence in the normal fabric of time? Would I be able to attend my funeral? Can the time machine travel to a time before it was created?

On a more atomic level, this would mean that the same atoms would exist at the same time at a point in time - time travel would result in the creation of duplicate matter at a moment in time (The Atomic Twins Question). How will it affect that point in time that the object has travelled to? How will if affect the point in time that object has travelled from? How will it affect time and other matter between the two points in time?

Friday, 25 October 2013

Geyser Timer Switch

Geyser Timer Switch - Hot Savings!


Do you hate waking up early in the morning to switch on your geyser? Do you sometimes wake up late and have to bath with cold water? Is your electricity bill driving you up the wall? Relax, get yourself a timer switch like the one in the figure below.

Timer Switches on a Distribution Board

You can programme a timer switch to switch your geyser on/off on your behalf. This means you'll never have a cold bath again (You'll have no choice when there's no power, it can't help you there). The switch also has a manual override. You can keep it in the OFF position when you are going away on holiday, or you can keep it on the ON position when you need lots of hot water all day long. One of the features I have discovered lately is that you can put it manually on ON mode, then put it on AUTO mode. This will force the switch to go into the ON mode, even though it's not supposed to and automatically switch off as per its programmed OFF time.

A timer switch will cost you around R150 in South Africa and these pay for themselves in about 3 months (Just a guess, I did not do proper calculations). Please get e registered electrician to do the installation otherwise your house might go up in flames due to an electrical fire.

Thursday, 24 October 2013

PS3 as a Media Player

PS3 as a Network Media Player - I ain't Playing Playa


I am currently using my PS3 as a network media player. Reasons that you may want to do this are:

1. You don't store any media (pictures, video or music) on your PS3, so it remains fast
2. The media on network attached storage is easier to manage

The setup I have at home is PS3 connected to a Netgear router, a Netgear ReadyNas drive (which is a DLNA certified NAS drive) also connected to the router. The PS3 is connected to my Sony STR-DA3200ES ES 7.1 Channel Surround Sound A/V Receiver via a single HDMI cable. The Sony Receiver sends full high definition (Full HD) images to my Sony Sony KDL46EX500 television.

Sony KDL46EX500


STR-DA3200ES

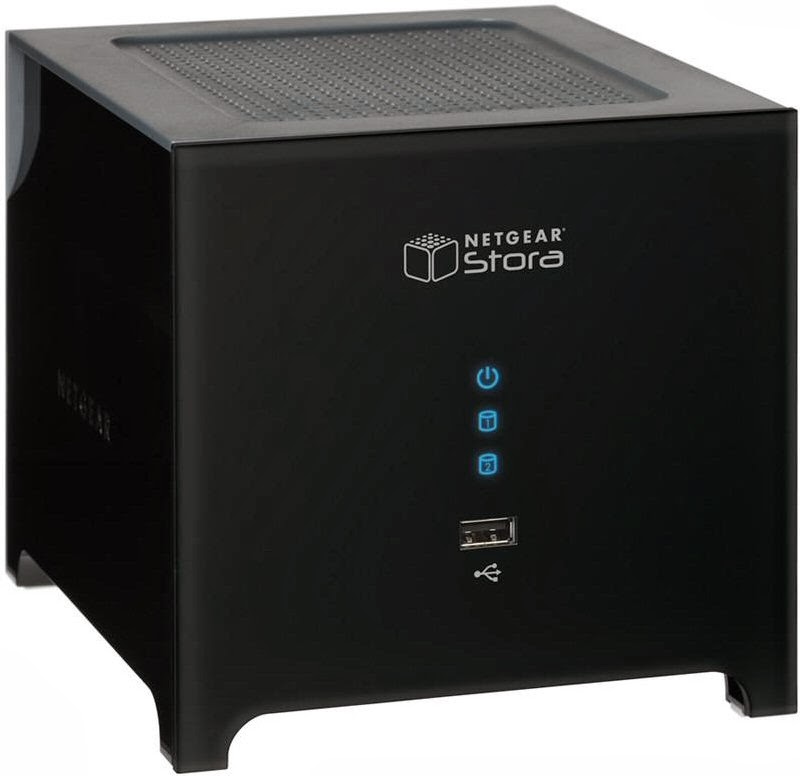
Netgear Stora 2 Bay NAS Drive


Wednesday, 23 October 2013

X-RAID EXPLAINED

X-RAID: I See IT, Eye Know IT


Please check this video by Netgear on X-RAID Technology:

http://www.youtube.com/watch?v=P96HqEx8hB8

Netgear's X-RAID

X-RAID — RAID for the rest of us (http://www.readynas.com/?p=214)


The X in X-RAID stands for “expandable”, and as you may guessed, X-RAID is expandable RAID. So you’re probably asking “great, it’s expandable, but how?” or “how much work do I need to make my RAID expand?”
The answer is it’s automatic. That means there’s no need to worry about selecting the wrong command or trying to remember the right series of steps. The ReadyNAS makes all the right decisions for you.
To really see how easily it works, let’s start out with a one-disk ReadyNAS and go through the X-RAID expansion process. Remember that with just one disk, there’s no data redundancy, so when that one disk fails, your data is lost.
1disk.jpg

Adding a 2nd disk

If you had started off with a one-disk ReadyNAS and wanted to have protection from disk failure (often referred to as having redundancy), you’ll need to add a 2nd disk that is at least as large as the first disk. The disk can be added when the ReadyNAS is powered off, or it can be hot-added while the ReadyNAS is running. Simply insert the disk into an empty tray, secure it with 4 screws, and insert the tray into the a disk slot. It can be any slot, but to keep it simple, add it to the 2nd slot from the left.
Once the 2nd disk is added (or when the ReadyNAS is powered on after adding), your 2nd disk will start syncing to the 1st disk. Depending on the size of your disk, it may take anywhere from 30 minutes to several hours. The sync occurs in the background so you can still keep on working with the ReadyNAS during this time.
Once the sync process completes, your data volume is now redundant, meaning if one of the disks fails, the other disk still contains the data, and thus your data is now fully protected from a disk failure. The capacity of the disk is the same as when you had just one disk.

Adding a 3rd disk

You can add the 3rd disk just like you added the 2nd disk. For our discussion, we’ll hot-add the disk, as you really don’t need to power-down the ReadyNAS if it supports hot-swappable disk trays. Just make sure you are adding a disk of at least the size of the 1st disk. You can add a larger disk, but the extra space will not be utilized until all disks are at least that size.
Once you’ve added the 3rd disk, the disk will be initialized and will be scanned to make sure it is good. This is done in the background and can take anywhere from 30 minutes to several hours, again depending on the disk capacity. There’s no performance impact during this time and you can continue to work with the ReadyNAS during this init process.
When the init is complete, your data volume will begin to expand automatically. Again, this is done online, so you can continue to work while the expansion is going on. The time for expansion depends not only on the disk size but also the number of files in your volume. The more full and the more files you have in your volume, the longer the expansion process. Typically the expansion process can take an hour to 12 hours or more. Once complete, your existing data will still be there, but your data volume will be twice the size of your 1st disk, and it remains protected from a disk failure.
One thing you might notice is that with a 2-disk X-RAID, the overhead for redundancy is one disk, and with a 3-disk X-RAID, the overhead for protection is still only one disk. This will be the case with X-RAID even when you add a 4th disk.

Adding a 4th disk

Adding a 4th disk is identical to adding a 3rd disk, other than the fact that the resulting capacity is 3 times that of the 1st disk. In fact, if you had wanted to add the 3rd and 4th disks at the same time, you can do this to save time. Just add the two disks while the ReadyNAS is powered off, as it’s important to add the two disks at the same time to kick off the init process at the same time.

Horizontal vs. Vertical expansion

The process of expanding from one disk to four disks is what we refer to as horizontal expansion. X-RAID also supports another form of expansion that we refer to as vertical.
With horizontal expansion, the capacity is limited to 3x of your original disk. But as larger disks are available or they become more affordable, and you need more capacity, you may want to grow your volume even larger. This is where vertical expansion comes into play.
X-RAID supports replacing each of your disks with larger capacity disks while keeping your data intact, whether you have 2, 3, or 4 disks. Simply replace each of your disks one by one with a larger disk. Each time you replace a disk, the ReadyNAS will initialize it, scanning to make sure the disk is good. This can take anywhere from 30 minutes to several hours, just like in the horizontal expansion process. After the init process, the disk will be sync’d to restore data redundancy. Again, this process can take 30 minutes to several hours. Both these processes occur in the background, so you can continue using the ReadyNAS as usual.
vertical.jpg
Once you have done this for all four disks, just reboot the ReadyNAS to start the volume expansion which occurs in the background. When the process completes, your data will remain intact, but your data volume capacity will have expanded to 3x of the smallest capacity disk in your ReadyNAS.
The beauty with vertical expansion is that you can keep expanding your volume repeatedly with larger capacity disks, a definite future-proof advantage that you can count on with the ReadyNAS.

RAID

A Day Without Raid


RAID stands redundant array of independent disks. This is is a storage technology that combines multiple disk drive components into a logical unit for the purposes of data redundancy and performance improvement. Data is distributed across the drives in one of several ways, referred to as RAID levels , depending on the specific level of redundancy required and performance required.

Next topic will be a discussion on Netgear's X-Raid technology